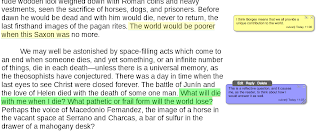
I started looking at social bookmarking, but the ones I explored were not robust enough. For true annotation, we need to be able to do more than highlight or mark. While some offer commentary and notes, the collaborative part was not as intuitive as I liked. There are likely other options out there, and I'd love to hear about them.
Here is what I found:
 |
| Markup Toolbar |
This bar will appear in the top right hand corner of the screen. Using the bar, the site can be annotated with text, underlining, highlighting, etc. Here is an example:
 |
| Annotated YouTube Page |
Once finished, the user can publish the Markup. The publish button appears under the pen once the page has been annotated. A screen appears with a website url.
The site can now be shared via the link and others can respond. Everyone can work on the same one. The downside to Markup is that it does not seem to work with Google Docs, even if I make the settings public. There are a few other sites, too, that will not pull up the Markup bar.
Bounce - Bounce provides a method for commenting on a website. With Bounce, the first person will type a web address onto the main page.
 |
| Bounce Main page |
 |
| A Bounce Box ready for comment |
 |
| A.nnotate Home Screen after Log-In |
A.nnotate - A.nnotate requires an account to be made. Unlike the previous options, this one allows users to upload files or for users to take a snapshot from the web.
 This way, a pdf can be placed in the tool and the site provides an opportunity for collaborative annotation. Only the originating user needs an account for A.nnotate, so this helps somewhat. To annotate, the user will highlight text. After highlighting, a box appears for a comment. When finished annotating, the user clicks "share" to begin collaboration. Do not hit "done" if you want to conntinue annotating the document!
 After hitting "share," a pop-up will appear with options including email and a link. Click the "guest annotation" to allow non-registered user to have access. Unlike the other tools, A.nnotate gives the creator the opportunity to review comments before displaying them. Also unique to this tool is the ability to create a folder of files to annotate and share. Unfortunately, future users can delete current comments. To keep from requiring account creation, future collaborators can choose a color for commenting and be consistent.
 |
| A Padlet Created for Image and Argumentation |
Only the creator can remove posts. Like with Bounce, there is no way to highlight or underline. Some of these sites will allow uploads of files, and some comments can include links and videos, which can make the site very dynamic and active.
Thinglink / Speaking Image - These tools provide a way to make images interactive. If using a text, and the text is short, these will work here as well (see example). By creating buttons on the page, users can customize the buttons to represent the types of comments made. These buttons can link to video, audio and more.
 |
| Thinglink of a short text with buttons |
There are some others out there, but most fell under these kinds of categories. All have pros and cons, but I think all have great possibility. We have to think first about what we want from the annotation and collaboration and then choose the best tool for the job.
Wiggio - Wiggio is a collaborative workspace where groups can create, collaborate, share files, and even text, email and send voice notes to each other. While there is a premium version, the basic version
 |
| Wiggio Feed Page |